Building athletes for more than 25 years, their rugged strength training equipment helps users get to where they strive to be. Hammer Strength rewards hard work with results. Results that elite athletes have been relying on for decades.
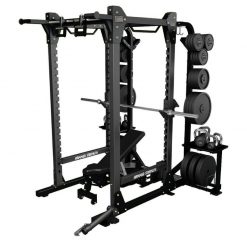
Their machines are deigned and constructed with biomechanics in mind, making equipment that moves in the same way as the body does. Hammer Strength’s HD Elite Racks offer high-intensity and multifunctional hubs.
They offer everything from benches, racks, weight stack machines and strength training accessories.