From our range, Health & Wellbeing
Which Cardio Workouts Burn the Most Calories?

Jan
Cardio is a great way to shed the pounds, tone up and boost endurance. The higher the intensity the more calories you burn. This however, doesn’t mean you have to brace yourself for a long, gruelling session on the treadmill. If you’re looking for ways to switch up your workouts or ramp up the intensity, there’s plenty of activities to consider.
The number of calories you burn during one session depends on body weight, body fat percentage, age, physical fitness, genetics and environmental conditions.
Running, biking or swimming at a steady state pace is enough to burn some serious calories, but if you up your pace for just a period of time you’ll increase the burn even more.
Running
Because you are propelling your body forward, running accounts for a high calorie expenditure. The faster you run the more calories you burn – six miles per hour can burn around 400 calories in 30 mins.
Try doing 2 minutes full intensity and 1 minute active rest (moving as opposed to remaining stationery).
As a form of aerobic exercise running keeps the heart and lungs healthy. It’s soft on your joints and works the core. Great for the mind as well as the body, running reduces stress and alleviates symptoms of depression. It’s also rumoured to improve memory, the ability to focus and boosts the immune system.
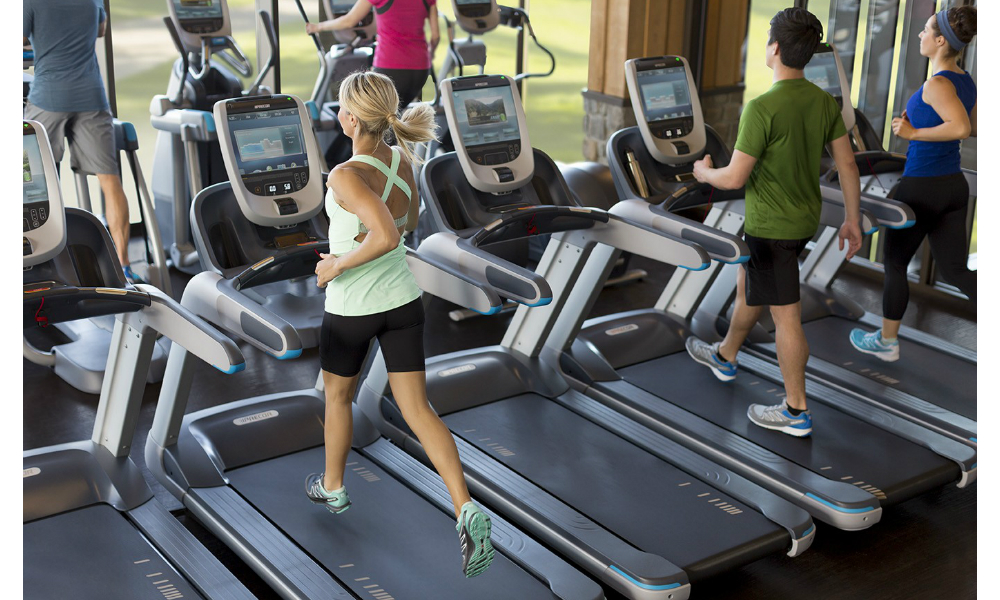
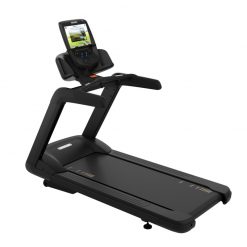
The insight driven design of the Precor TRM 781 Treadmill boasts reliability, performance and efficiency. Built for commercial gyms this piece of equipment is made to last. The treadmill also features the 780 line 15″ touchscreen console, providing users with a premium entertainment experience and engaging workouts through an intuitive interface.
Rowing
Rowing works your legs, shoulders and back. Using nine major muscle groups, including the hamstrings, quads, glutes, core, lats, shoulders, your back, biceps and triceps! Where you are rowing counts too, on a machine you can burn around 315 calories every half hour. On water however, you torch around 500 calories.
Rowing is an effective aerobic exercise keeping the heart and lungs healthy. This form of cardio is low impact, with low risk of injury. It’s also beneficial when looking to increase stamina, flexibility and toning.
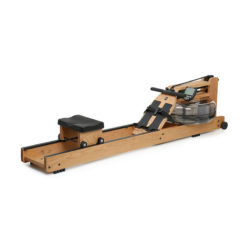
Product – WaterRower Natural
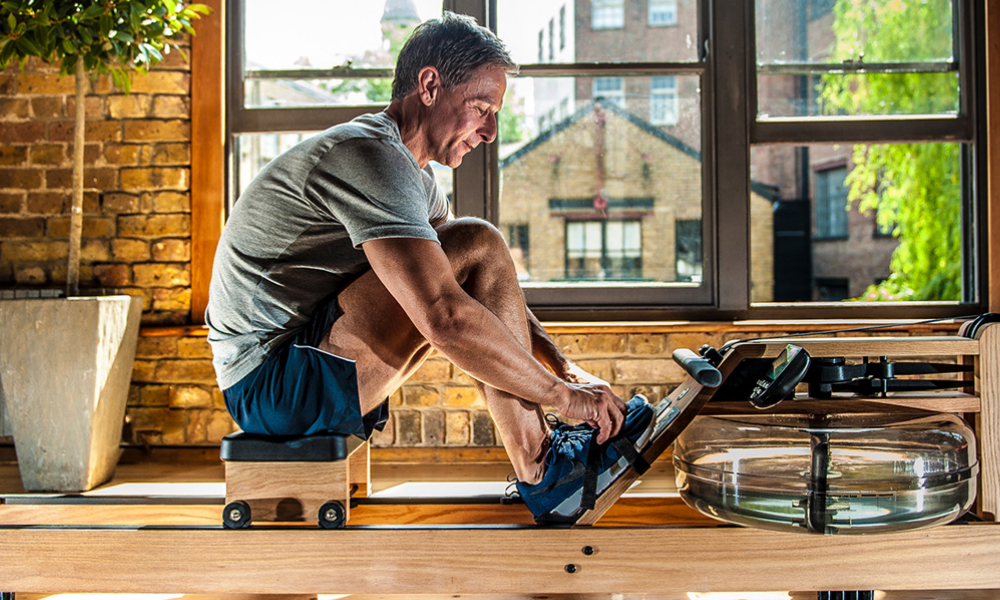
Made in honey-oak this stylish WaterRower is a feature just as much as it an efficient piece of equipment. The WaterFlywheel tech is unrivalled in its ability to replicate the feeling of rowing on water. The wood design absorbs sound and vibration giving you a smooth and quiet session.
WaterRower only uses woods that will stand the test of time and are sourced from sustainable forests.
Skipping
Skipping is as taxing as sprinting (believe it or not), for best results skip in intervals, where you jump rope at high impact for a few minutes then jog in place for a minute or two. This exercise uses more muscle groups than jogging and challenges your balance and coordination! Engage your arms and shoulders with this exercise. It also tones muscles in the upper and lower body. Helping to attain balance, coordination and agility.
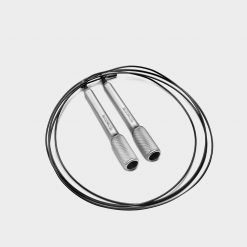
Product – Technogym Jump Rope
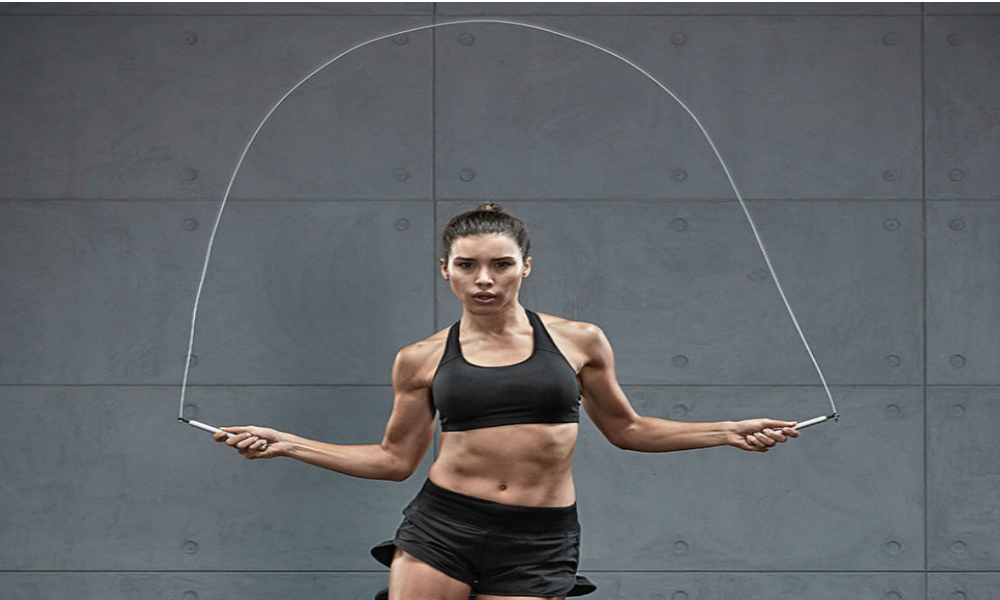
The Technogym Jump Rope helps build coordination, improving overall speed, agility and quickness. Their smart design gives you handles that improve grip, and the feature ball bearings generate a more efficient rotation during training.
Hill Workouts
Throw some resistance into the mix to amp up your running or cycling session. Cyling up a steep hill recruits more muscle fibres, improves strength-to-weight ratio and technical skill. You’ll burn much more calories than you would on a flat surface. Fire up your glutes and burn around 500 calories.
Ramping up your cardio with Hill Workouts increases speed, improves form and builds endurance. It also helps form fatigue resistance, ideal for long distance training. The challenge brings about physiological adaptation and is as much a mental challenge as it is a physical one.
Product – Cybex R Series Upright Bike
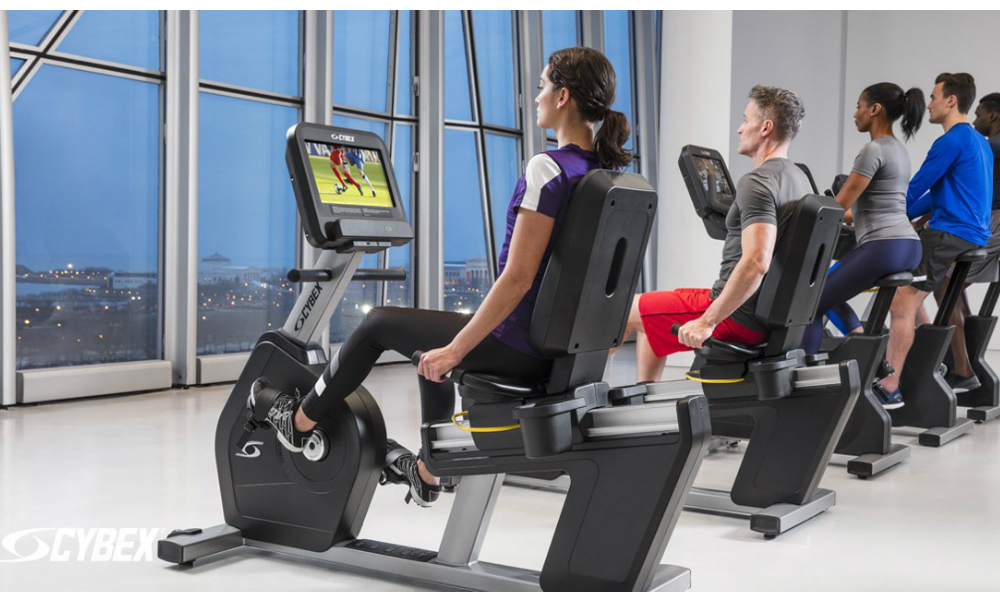
This stylish upright bike has three quick-resistance selections, allowing for easy interval workouts, ideal for results-driven exercisers. The bike is designed for facilities that provide intuitive cardio equipment focused on achieving results.
Skiing
This is another exercise that utilises the entire body, using both your arms and legs you are ramping up the intensity. Skiing for 30 minutes burns around 300 calories.
It improves balance, agility and core strength. Strengthening the lower body muscles – working the inner and outer thighs, hamstrings, quads and glutes. It is especially ideal for increasing cardiovascular endurance.
Product – Concept2 SkiErg
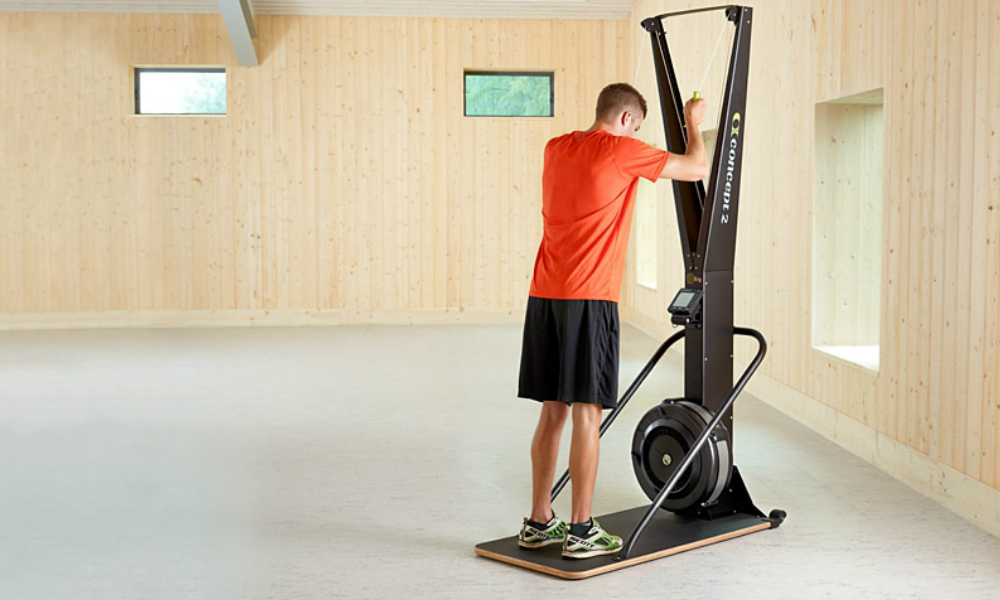
This cardio machine simulates Nordic skiing it’s great for strength, getting your heart racing and blood pumping. The SkiErg uses flywheel resistance and electronic monitoring systems.
For a quick cardio workout...
Body weight exercises are great for cardio, combine them with machines for ultimate impact. There’s plenty of exercises you could do:
- Jumping Jacks
- Mountain Climbers
- Burpees
- Walking Lunges
- High Knees
- Plank-to-Squat
- Lateral Hops
- Jump Squat
No matter what exercise you choose to do, ramping up the intensity in short bursts will boost calorie burn. Cardio can be incorporated into almost any exercise, if you just increase the level at which you are working. So do some sprint intervals while you are on the treadmill or row vigorously in bursts when on the rowing machine.
Whichever activity you do, just make sure to go at full pace going with a 2:1 ratio or ramp up the cardio factor by challenging yourself and taking the exercise to the next level.
Buy These Products


Director & Founder – Gym Marine Yachts & Interiors.
I began my career onboard superyachts working for some of the world’s most discerning clients, finding health & fitness to be a common passion amongst all of them. Starting Gym Marine at 24 has been my proudest achievement yet, and today we are striving to become world leaders in our field.